View

Wednesday, 20 April 2011

Toast Message


public class ToastMessage extends Activity {
    /** Called when the activity is first created. */

    @Override
    public void onCreate(Bundle savedInstanceState) {
        super.onCreate(savedInstanceState);
        setContentView(R.layout.toast);
        Context context = getApplicationContext();// TOAST MESSAGA START
        CharSequence text = " Welcome To  toast Message !";
        int duration = Toast.LENGTH_LONG;
        Toast toast = Toast.makeText(context, text, duration);
        toast.show(); // TOAST MESSSAGE CLOSe
      
    }
}

Tuesday, 19 April 2011

Date And Time Picker


Type these code in main.Xml

<Button
 android:background="#4B088A"
 android:layout_width="60dp"
 android:textSize="15dp"
 android:layout_height="30dp"
 android:textColor="#E6E6E6"
 android:text="MONTH"
 android:id="@+id/button1"
 android:layout_x="25dip"
 android:layout_y="56dip"></Button>

  <Button
 android:background="#4B088A"
 android:layout_width="55dp"
 android:textSize="20dp"
 android:layout_height="30dp"
 android:textColor="#E6E6E6"
 android:text="TIME"
 android:id="@+id/button2"
 android:layout_x="225dip"
 android:layout_y="58dip"></Button>

  <TextView
 android:layout_width="wrap_content"
 android:id="@+id/textView1"
 android:layout_height="wrap_content"
 android:textColor="#FF0000"
 android:textSize="15dp"
 android:text=""
 android:layout_x="108dip"
 android:layout_y="56dip"></TextView>
---------------------------------------------
sr/package-name/sample.java


import java.util.Calendar;
import android.app.Activity;
import android.app.DatePickerDialog;
import android.app.Dialog;
import android.app.TimePickerDialog;
import android.os.Bundle;
import android.view.View;
import android.widget.Button;
import android.widget.DatePicker;
import android.widget.TextView;
import android.widget.TimePicker;

public class Sample extends Activity {


private  TextView mDateDisplay;
private int mMonth;
private int mDay;
private int mHour;
private int mYear;
private int mMinute;
static final int TIME_DIALOG_ID = 0;
static final int DATE_DIALOG_ID = 1;

@Override
    public void onCreate(Bundle savedInstanceState) {
        super.onCreate(savedInstanceState);
        setContentView(R.layout.main);
      
        mDateDisplay = (TextView) findViewById(R.id.textView1);
        Button pickDate = (Button) findViewById(R.id.button1);  
        pickDate.setOnClickListener(new View.OnClickListener() {
         public void onClick(View v) {  
         showDialog(DATE_DIALOG_ID);  
         }    
         });      
        Button pickTime = (Button) findViewById(R.id.button2);  
        pickTime.setOnClickListener(new View.OnClickListener() {
         public void onClick(View v) {        
         showDialog(TIME_DIALOG_ID);    
         }    
         });      
        final Calendar c = Calendar.getInstance();  
        mYear = c.get(Calendar.YEAR);  
        mMonth = c.get(Calendar.MONTH);  
        mDay = c.get(Calendar.DAY_OF_MONTH);
        mHour = c.get(Calendar.HOUR_OF_DAY);
        mMinute = c.get(Calendar.MINUTE);    
        updateDisplay();  
        }    @Override
        protected Dialog onCreateDialog(int id) {  
         switch (id) {      
         case TIME_DIALOG_ID:  
         return new TimePickerDialog(this,                  
         mTimeSetListener, mHour, mMinute, false);  
         case DATE_DIALOG_ID:  
         return new DatePickerDialog(this,
         mDateSetListener,  
         mYear, mMonth, mDay);  
         }    
         return null;  
         }    @Override
         protected void onPrepareDialog(int id, Dialog dialog) {
         switch (id) {  
         case TIME_DIALOG_ID:    
         ((TimePickerDialog) dialog).updateTime(mHour, mMinute);
         break;    
         case DATE_DIALOG_ID:    
         ((DatePickerDialog) dialog).updateDate(mYear, mMonth, mDay);
         break;
         }
         }        private void updateDisplay() {
         mDateDisplay.setText(
         new StringBuilder()  
         // Month is 0 based so add 1
         .append(mMonth + 1).append("-")
         .append(mDay).append("-")
         .append(mYear).append(" ")
         .append(pad(mHour)).append(":")
         .append(pad(mMinute)));
         }  
         private DatePickerDialog.OnDateSetListener mDateSetListener =
         new DatePickerDialog.OnDateSetListener() {
         public void onDateSet(DatePicker view,
         int year,
         int monthOfYear,
         int dayOfMonth) {
         mYear = year;  
         mMonth = monthOfYear;
         mDay = dayOfMonth;
         updateDisplay();
         }
         };  
         private TimePickerDialog.OnTimeSetListener mTimeSetListener =
         new TimePickerDialog.OnTimeSetListener() {
         public void onTimeSet(TimePicker view, int hourOfDay, int minute) {
         mHour = hourOfDay;
         mMinute = minute;
         updateDisplay();
         }
         };
         private static String pad(int c) {
         if (c >= 10)
         return String.valueOf(c);
         else
         return "0" + String.valueOf(c);
        }
    }


How To Exit The Application Using In Button


Open the layout XML and add the button element.Assign an ID with the “@+id” operator.The + tells Android to generate an ID for this element so that you can reference it in your Java files.This is an example.Your layout and text elements will probably be very different. In this example case, the ID of the button is “close”.


<Button android:id="@+id/close"
    android:layout_width="fill_parent"
    android:layout_height="wrap_content"
    android:layout_alignParentBottom="true"
    android:text="@string/title_close" />

//Open the activity class.  Add a class property to hold a reference to the button.
  private Button closeButton;

//Now, in the onCreate method, attach a listener to the click event for the button. This example will call //“finish()” on the activity, the Android analog of clicking the close button on a window.

 this.setContentView(R.layout.main);
 this.closeButton = (Button)this.findViewById(R.id.close);
        this.closeButton.setOnClickListener(new OnClickListener() {
          public void onClick(View v) {
            finish();
          }
        });


Wednesday, 13 April 2011

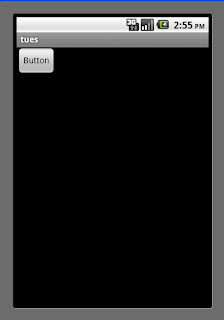
Click the Button and open Image Gallery


import android.app.Activity;
import android.content.Intent;
import android.net.Uri;
import android.os.Bundle;
import android.view.View;
import android.view.View.OnClickListener;
import android.widget.Button;
import android.widget.ImageView;

public class tuesdayAppli extends Activity {
    private static final int SELECT_PICTURE = 1;
/** Called when the activity is first created. */
Button button1;
    @Override
    public void onCreate(Bundle savedInstanceState) {
        super.onCreate(savedInstanceState);
        setContentView(R.layout.main);
      
        button1=(Button)findViewById(R.id.button1);
        button1.setOnClickListener(new OnClickListener() {

@Override

public void onClick(View v) {
// TODO Auto-generated method stub
Intent intent = new Intent();
intent.setType("image/*");
intent.setAction(Intent.ACTION_GET_CONTENT);
startActivityForResult(Intent.createChooser(intent,
"Select Picture"), SELECT_PICTURE);
}
});
    }
        protected void onActivityResult(int requestCode, int resultCode, Intent data) {
          super.onActivityResult(requestCode, resultCode, data);
          switch(requestCode) {
          case SELECT_PICTURE: // our request code
           if(resultCode == Activity.RESULT_OK)
           { // result was ok
           Uri selectedImage = data.getData();
           Intent i = new Intent(getApplicationContext(),ImageView.class);

               // ----------------- Problem Area -----------------
               // I would like to send the filename to the Intent object, and send it over.
               // However, the selectedImage.toString() method will return a
               // "content://" string instead of a file location.  How do I get a file
               // location from that URI object?
               i.putExtra("PICTURE_LOCATION", selectedImage.toString());

               // Start the activity outlined with the Intent above:
               startActivity(i);
           }
  }
              
            }  
  
 
}


Tuesday, 12 April 2011

Center Alignment Button


This Sample XML code to show the Buttons present in the center of the Emulator,just try it.


<?xml version="1.0" encoding="utf-8"?>
<RelativeLayout xmlns:android="http://schemas.android.com/apk/res/android"
android:orientation="vertical" android:layout_width="fill_parent"
android:layout_height="fill_parent">


<TextView
android:id="@+id/textView1"
  android:layout_width="fill_parent"
android:layout_height="wrap_content"
  android:layout_alignParentLeft="true"
android:gravity="center"
android:textSize="22dip"
android:background="#008000"
android:typeface="serif"
  android:text="Main Menu">
</TextView>


<Button
  android:layout_width="200dp"
android:textSize="10dp"
android:layout_height="30dp"
android:paddingLeft="35dp"
android:paddingRight="35dp"
android:text="New Greeting"
android:id="@+id/button1"
android:maxHeight="10dp"
android:layout_below="@+id/textView1">

</Button>

<Button
  android:layout_below="@+id/button1"
  android:textSize="10dp"
android:layout_width="200dp"
android:layout_height="30dp"
android:text="My Greeting"
  android:id="@+id/button2"
android:layout_alignLeft="@+id/button1"
android:layout_alignRight="@+id/button1">
</Button>


<Button android:layout_below="@+id/button2"
android:textSize="10dp"
android:layout_width="200dp"
  android:layout_height="30dp"
android:text="My Gift"
  android:id="@+id/button3"
android:layout_alignLeft="@+id/button2"
android:layout_alignRight="@+id/button2">
</Button>


<Button
android:layout_below="@+id/button3"
android:layout_width="200dp
  android:layout_height="30dp"
android:text="Pending Greeting"
  android:id="@+id/button4"
android:textSize="10dp"
android:layout_alignLeft="@+id/button3">
</Button>

<Button
android:layout_below="@+id/button4"
android:layout_width="200dp"
  android:layout_height="30dp"
android:text="Greeting Calendar"
android:id="@+id/button5"
android:textSize="10dp"
android:layout_alignRight="@+id/button4">
</Button>

</RelativeLayout>


Android Bridge: Recursive (Sub directory) File System Watcher in A...

Android Bridge: Recursive (Sub directory) File System Watcher in A...: "Today, I was looking into monitoring directory changes in Android. It looks like FileObserver class in Android does not support recursive su..."

Android Sample Running Program

Hi Friends,

Now we will see how to run hello world application and other sample applications.

HelloWorld App or HelloAndroid App


you need to comment out or delete this line in the program.
setContentView(R.layout.main);


For importing header, we have to click Ctrl+Shift+O
it didn't work for me, heres what i did

After pasting this line "import android.widget.TextView;
To import the header, you will see something to the right of the code window called "Outline"
Right click on the "import declarations"
in it choose "Source ->  Organise Imports"

Errors You might face :
You could face "Build Path Problem" error saying
Project 'com_example_android_blah....' is missing required source folder: 'gen'
when trying to run the the application.

If you encounter this error,
then go to "Project - > Clean " and run the project again.

Wait for the simulator to load, it will take upto 5 minutes,
If you are not seeing the application after 5 minutes, click on the "Menu" button on the right.


Running Sample Apps :

Open Eclipse IDE, Choose " File-> New -> Other "
Choose "Android -> Android Project "
Click Next
In the next screen,
Under "Build Target" , choose one sdk version from the available one.
Then, Click on the radio option "Create Project from existing sample"
Choose one of the samples from the drop down menu and Click on "Finish"

It will be added to the Package Explorer on the left,
Click on that name, then Just Run the application,
When a "Run as" dialog appera, Choose "Android Application" Click "OK",
You will see the simulator opening in some seconds, but wait for the simulator to finish  loading, it may take upto 5 minutes.

Hope you guys are able to replicate this.
If you are facing any issues, feel free to post to the mailing list, we will try to solve the issue.

Android Getting The Setup Ready

Hi,

Here are the steps to setup the environment for Android Development,
Please go through the following.

If you are using Windows XP, its hassle free.
If you are using Windows Vista or Windows 7, there are few issues you will face, i will tell you then and there.

Step 1 : JDK version 5 or JDK version 6 only. Don't use version 4,it seems to cause some issues.
Download & install JDK, then set the environmental variable "PATH" pointing to the bin directory of the jdk.

Step 2 :  Download the "Eclipse IDE for Java Developers"  version 3.5 from www.eclipse.org/downloads/ 
Its a zip file, download and unzip to some location like say "C:\eclipse\"
Note : When you run the eclipse.exe , it will ask to choose a workspace, create a new folder called "workspace" inside the eclipse folder itself for our convenience and choose it.


Step 3 : Download the Andoid SDK Pack from http://developer.android.com/sdk/index.html 
Its again a zip file, download and extract to some location like "C:\android\"
I'm keeping the path simple, to make it easy to remember and access. you can actually use any path.
The one we are downloading at this stage is not the actual SDK but the "Android SDK and AVD Manager".
On running the "SDK Setup.exe" from the unzipped files, you will be presented with some options to download, it may fail saying some error.
To resolve it Go to Settings, under Misc section, check the "Force https://..." option.
Now go to "Available Packages" (menu on left),
Click "Refresh" button present in bottom right of that window,
Then expand the list of available packages by clicking on ">" near the description https://dl-ssl./.......
Then select atleast one version of the sdk to download and install.
Note that you need internet for this step.
Lets say, we chose SDK 2.1 version, then choose
Documentation
SDK Platform
Samples
Google API
All of these for one version of SDK.
Then let it download and install all these.

Step 4 : Install the ADT Plugin in the Eclipse IDE, 
 Select Help -> Install New Software
Give some name.
If it doesn't work, try http
Choose the two updates availbale and install them
then restart Eclipse.

Now we have to configure the Eclipse,
Go to "Window -> Preferences" then choose Android on the left,
Then select the location of the Android SDK,
point to the "C:\android\" folder 
Click on Apply and Ok.

Step 5 : Now we have to setup the AVD
To create an AVD,
Just run the "SDK Setup.exe" from the android sdk folder
Select "Virtual Devices" from the left menu, the Click on the "New" button on the right,
Type a name, chose a target, give the size of sd card as something like 100mb, stick with default resolution ,
then click on create AVD.

Now check whether emulator is working ok.
To check it, Select a AVD you created, then click on "start" button on the right,
Now wait 5 minutes for the simulator to load,
You will see the simulator with a colourful background and phone, try to use it.
Just play around in the simulator for a while.

This is not essential, but easier to run samples,
Go to "C:\android\samples\android-8",
Copy all the folders in it,
and paste it to the Eclipse workspace we created at "C:\eclipse\workspace"

The setup is over now.
Note: If You are using Windows Vista/ Windows 7,
Go to the eclipse folder, select eclipse.exe, go to properties, and choose "Compatability", Tick the "Run as Administrator" option, and ok.

Now we are ready to run the create android apps.
I will mail how to run sample apps in next mail.